Are you bad with directions?
Do you constantly check-in on social networks like Facebook Places or FourSquare?
Do you have an Iphone, Android phone or any other smart phone?
Chances are, you would have already used, or own a GPS if you answered yes to any of the above.
So what can the GPS module bring to LEGO Mindstorms NXT that I couldn't already do on my Smartphone?
Well for starters, the GPS is actually quiet an advance piece of technology. By calcualting the distance to each satellites in space, it would be able to triangulate its current location. You should read more about the concepts and theories on how it actually calculates its location at the wiki site
here.
However, this advance technology is no use if you don't understand or know how to utilise it.
The good thing about the getting the GPS module for the NXT Mindstorm is that, you'll have to write your own codes, rather than just downloading the apps and run it on the phone.
You'll need to know a little GPS concepts, and lots of creative ideas on how to implement or use it.
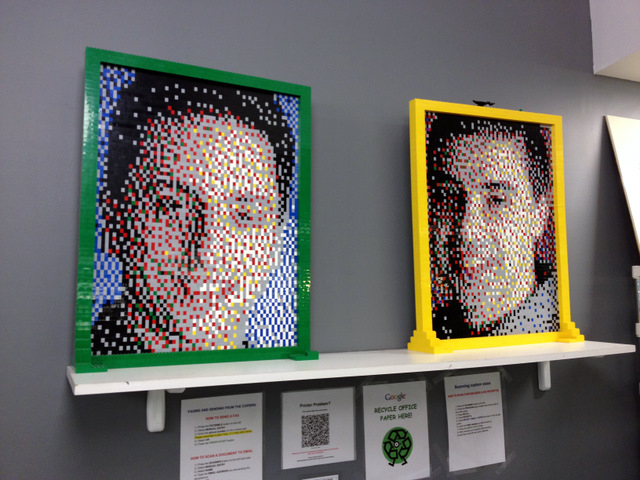
The review that I will be doing today would be based entirely on the NXT-G blocks that have been provided by Dexter Industries. In the photo above, I have both the dGPS module writting the to the NXT display, while on the right, I have HTC Desire with a GPS app, obtaining it the current location coordinates. If you are able to look closely, both of them are actually giving out different coordinates... of by a few decimal points.
I have plotted both the coordinates on Google Maps. As you can see, both shows a different location, about 10 feet apart. Which one is more accurate? Well both is off by a little, as in one if off to the right, while the other is off to the left. I would need to check this with a few more location to determine which is the most accurate.
In the same map, I have also plotted a path that takes me around the KT town area. The path is marked in red. I have also attached the NXT-G files used to log the data, as well as a KML Path Creator at the end of this post.
You'll have to download 2 custom NXT-G Blocks available
here. One you have downloaded and added it into your NXT-G software, you'll be to use it under the Advanced tab.
The first Block is the GPSRead, where it is able to extract all the information from your new dGPS module to your NXT. You could either write it to your NXT Display or even a text file on your NXT.
I have modified one of the sample codes to both display the information on the screen as well as write it to a file. When you write the coordinates to a file, with fixed interval, you'll be able to plot a path, as shown in the Google Map above (red path).
The next Block available is the NXTNavigation block. Given a destination coordinates, it will return the distance and angle to the destination from the current location. The usage is a little different from the GPSRead block, but it has it own purpose.
Overall the dGPS module is excellent. To log on to the satellites is pretty quick on a clear open sky (less than a minute), but takes up to a few minutes if it is very cloudy. The response that I am able to get, even at 1 second interval is acceptable.
I'll have to do more advance vehicle or robots to fully utilize the dGPS module's full potential.
Resources:
Download and view
PDF Instructions on how to Collect and Upload data to Google Maps.
Download the NXT-G file for data logging
here.
Download KML Path generator
here.


