Showing posts with label Mindstorms. Show all posts

Friday, 15 April 2011

Line Follower Algorithm - Which is the best?


Single Light Sensor - Bit logic method (1 Min 59 Sec)
Read full post here.


Single Light Sensor - PID method - Smooth (1 Min 29 Sec)
Read full post here.


Single Light Sensor - PID method - Over Correction (53 Sec)
Read full post here.


Dual Light Sensor - PID method - Smooth and Fast (33 Sec)
I have not posted about this Line follower that I had built. It moves really fast and because there is 2 light sensors, it is able to adjust and move along quickly. I am trying to optimize the dual sensor to go even faster. Will post the outcome when I am done.

Line Follower - PID Method - Over corrected!


This post is a followup to the previous PID Line Follower post, of which I was using the PID method. As you would have noticed in the previous post, the Line follower robot was moving very smoothly over the black line, however it was extremely slow!

Please note that the line follower robot is only using 1 light sensor, the left one. The robot has been built with 2 sensors for future test algorithm.

In this followup post, you'll notice that the robot moves along at faster rate, but the robot seems to be constantly oscillating, with a few occasion that it manage to reach equilibrium. This is because the robot seems to be over compensating. The reason that this could happen is because is because the robot's feedback loop is too slow to react, and is NOT able to compensate quick enough, causing it to go into an oscillation mode. I would have to re-code the robot using NXC or RobotC to overcome the speed issue.

Another possibility is because of the variables that I have used to adjust the robot for a faster speed, rather than a smooth moving robot. Maybe the setup variables is inaccurate, thus the robot is unable to hit its equilibrium. However in the video above, the robot did reach an equilibrium state (moving straight) occasionally.

I will post the source codes in the future post after I have done investigation on how to make the robot move faster yet smoother.

If anyone has manage to complete the above task, please post in the comments how you manage to make the robot move fast yet smooth with 1 light sensor.

Line Follower - PID Method - Smooth


I hope most of you have read the Bit Logic line follower algorithm. Next I will explore the PID method, which I have been reading alot lately on the Internet. I reckon, for most high school students understanding just the "theory" of PID will be enough to put you through college :p

Please note that the line follower robot is only using 1 light sensor, the left one. The robot has been built with 2 sensors for future test algorithm.

Anyway, if you would like a very detailed theory, calculations and formula for the PID method, please follow this link.


If you have watched the video, you would realised that the robot tries to correct itself to stay in the middle, between the black and white areas, as shown in the image above. After a few oscillation, it would be moving along the grey area (between the white and black).


The graph above shows the Motor power output vs the readings from the Light sensor. As you can see, the robot will always try to keep within the Grey area (dotted line B), which is the equilibrium. When the Left motor and Right motor, is travelling at the same speed, the robot is actually move straight.

When the Light sensor is above the White area (dotted line A), you'll notice that the Right motor will stop, while the Left motor is moving at full power, causing the robot to turn right, thus heading towards the Black line.

When the Light sensor is above the Black area (dotted line C), the Left motor will stop, while the Right motor is moving at full power, causing the robot to turn left, thus heading towards the White area.

As you can see, since the graph is linear, the robot should automatically correct itself till it is moving along on its equilibrium (dotted line B), as you can see in the video attached above.

Saturday, 9 April 2011

Line Follower - Bit Logic Method


I have been tasked to teach one of the most fundamental programming ideas, Line Follower.

Before we begin, we should understand what Line Follower algorithm there is, and what is the best and quickest method. So today we will explore the easiest one of them all, the 2 bit line follower algorithm.


View the image above, the Black Box represents an enlarged Black line, while the tiny Red line represents where the light sensor is on and what it will see. You will notice from the video above, you will notice that the NXT Mindstorms actually makes very tiny zig-zag along the black line. If you look closely, it is actually like the red line above.

The idea is simple, if the sensor is over White (Point 1), you turn right towards the Black area. When you are over the Black (Point 2), you turn left towards the White area. Effectively you are hugging the left edge of the Black line.


Using just the a simple Switch Block, and 2 Move Blocks, we are able to program the bit logic line follower, as explained in the previous paragraph.

Being the easiest line follower algorithm to understand and teach doesn't make it the fastest. It only manage to complete the track in about 2 minutes, which is extremely slow!

Monday, 22 September 2008

Kean's First Post

Hi guys, my name is Kean and im new to this blog, thanks to Eric's invitation :)

My background is in mechatronics engineering and currently working as a education trainer.

Since this is my first post i thought i'd post something interesting, something you wouldn't normally do with your NXT set in school. Allow me to present to you ( drums beating in the background.................) :

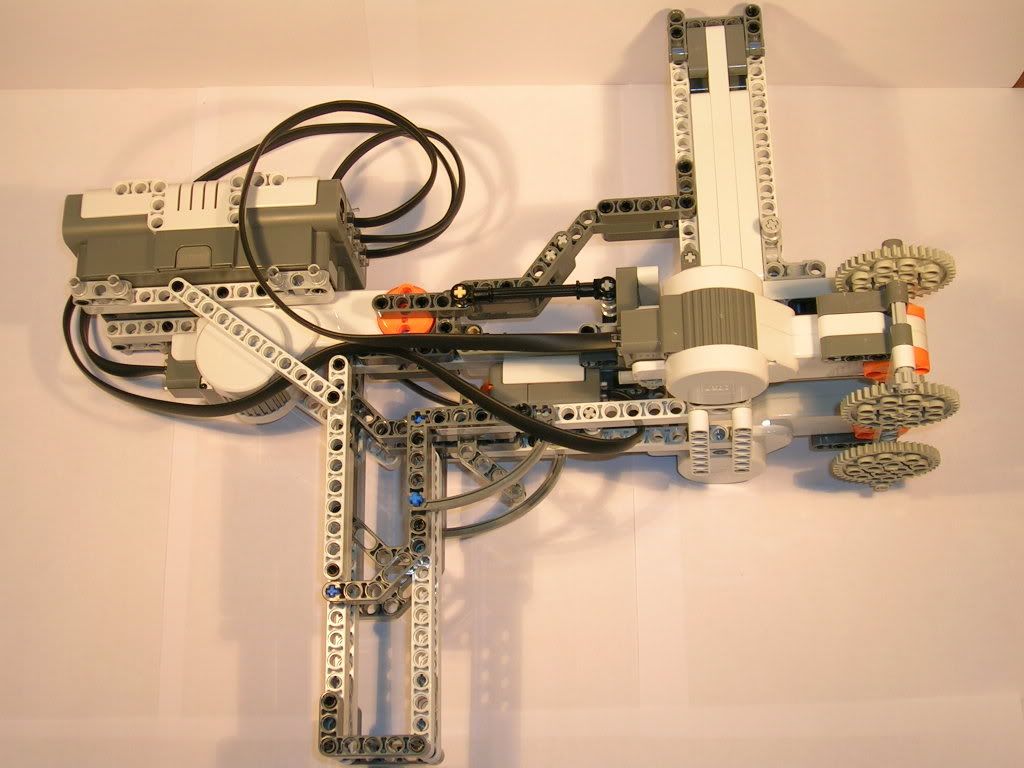
The NXT Bolter (Submachine gun)


I created this back in March. Inspired by Laurens Valk's 'Support Gunner' and other nxt guns, i decided to build a variation of my own. I wanted to build a gun which looks and feels like a real gun and hence - NXT Bolter.
It looks like a smg with an inverted magazine.I used 1 motor for loading the 'bullet' into the chamber, and another 2 motors for firing the 'bullet'. The firing is controlled by a touch sensor when the gunner pulls the trigger.
There are 2 modes to this gun: semi-auto and full-auto and the gunner selects the mode through the left and right button.The magazine can hold a maximum of 16 1x3 beams and the gun can be reloaded from the top of the magazine.

Wednesday, 2 April 2008

NRC 2008 - Ideas and Thoughts

I have been studying the NRC lower and upper secondary question. I must admit, it won't be an easy competition this year. There are so many things that we could consider. The list is endless, and if you need to test any and every combination, it would be a huge task.

Anyway, I will list down the stuff that we need to consider

Vehicle Design
  • Build using studless design, or traditional lego bricks with studs?
  • Using the NXT or RCX motor?
  • Have 1 or 2 motor as the driving force?
  • Do you use gearing to make the vehicle go faster?
  • Do you use tracks, 2 or 4 wheels?
Mechanical Arm
  • Using NXT or RCX motor?
  • When you grab the object is it from top down, or from the sides?
Software
  • Design using the Lego NXT-G software or Robolab 2.9?
Light Sensor Design
  • Do you use RCX or NXT light sensors?
  • Do you use 1,2,3 or 4 light sensors?
Overall strategy
  • Do we hard code the software to run without considering the tracks (black lines)?
  • Do we use a line following algorithm to move through the playing field?

So many different consideration. So many options. I guess, there is no 1 right answer. One may build a better robot, but without a good software design, it may not be able to complete the task and vice versa. To truly win the competition, the team must have a great design, in both software and hardware as well as speed and reliability.

Thursday, 20 March 2008

Bluetooth Remote Controller for Cars

I have just completed a Bluetooth Remote Controller to control a BT based Car. It is actually the controller for the Car built by one my students. You can see his creation here. As you can see, the BT Remote Controller has an accelerator and a steering built in.


You can build you own Remote Controller based on the LDD file I have provided. It is available from here. A sample NXT-G programming have also been provided for both the BT Remote Controller as well as the BT Car. BT Remote Controller RBT file here. BT Car RBT file here.

Sunday, 16 March 2008

Special Lego Robotics Classes


Today I had a another special 1 on 1 class for one of the students. When it comes to Lego Robotics, he is one of the more talented kids out there. From the previous class, I had instructed him to build a car and we would together create and program another NXT Brick as the BT Remote Controller.

As you can see from the following photos, he managed to create a car, using a turntable as a rear wheel differiantial. I know it sounds a little technical but if a 12 year old knows about it, shame on you!! :D

He had built a very simple steering on the front wheels. Not too sure of the name for these sort of steering mechanism, but a more popular styled steering is called the "Rack and Pinion Steering".


He also loves to build Bipeds or Walkers. In the month of March, NXTLog will be having a Biped challenge. I have instructed him to build a Biped and submit it. A little fun and challenge won't hurt anyone. You can read more about the Biped challenge at this link.

Wednesday, 12 March 2008

Lego NXT Advance Workshop

Today I had 2 students attend the NXTadvance Workshop. Since they were students of the previous tutor, Mr Andrew Lee, I had no idea of their levels whether in Building or Programming the NXT. The students in today's class were age 9 and 11.

Kids being kids, afraid of the media!

The day started out well. Kids being kids at their age had short attention span, not to mentioned that it was their school holidays. We started out by building the BBot.

The purpose was to teach them by examples more advance programming blocks. They needed to understand them before they could program more complicated and advance programs.

"Anybody can follow instructions and build a robot, but not everyone can program it"

Students in disccusions

The kids were very comfortable with building the BBot with the instructions given. After they had completed the BBot, I gave them a list of task to program. With the appropriate guidance, the kids had no issues completing the task on hand.

We proceeded to build more advance robot by the afternoon. Each of them, wanted to build something different. Allowing them to choose what they wanted to build, would encourage them to program it.

They day ended great, with me trying to manage the kids. They were more excited about their new creation, rather than how to write a good program to compliment their great invention. I can't blame them, kids at their age likes to have fun and games!

Eric pictured here with his Lego Tshirt!

A Simpler Grappler


This is my first post on my blog. The purpose of this project is to build a very simple Grappler (Robotic Arm). Because, I wanted to program using a Rotational Sensor block. I could only build a 1-axis robotic arm due to the 3 Tacho Motor and 3 Motor Ports limitation.

As you can, I have also used a very simple programming method. I wanted to test out, and to show how to use very simple Data Wires link between the Rotational Sensor block and the Techo block.